It's midnight 2 plus and ..as an awesome blogger , I decided to blog :)
And i GUESS you're gonna like it , OR ELSE.... *ahem*
So anyways ,
I wanted to do a post about my new O.P.I nail polish.

But i don't see anything to crap about since most of you already have it. T _ T *feeling inferior* You these richhhhhhhhhhh ........... argh nevermind keke xP
Nah !! :B
I took out my box of nail polishes , and i thought i shall do a post regarding...
" What's in my nail polish box? " !!
Oh well , cut the craps :)
Basically , all my nail polishes are kept in a pink box.
Nail polishes should be kept in a box because the bottles are made of glass , if you put them in a pouch , they will be knocking each other and it will probably cause them to break easily.
You know you will NEVER want your precious babies to break T _ T
Your nail varnishes should be kept in a COOL place :)
Okay , i guess most of you skipped all the words and see the pictures one right!!
Those points pretty useful alright!! :(
Well well , these are everything in my box.

And in details ...

(From left to right)
1)Nail File --- Something like sand paper sticked on cone sticks.
*How to file your nails ? 45 degrees slanted downwards and only file at a direction. right right right / left left left*
2)Orange Stick --- A thicker toothpick with a sharp side , and a side kindda like flat+slanted. Slanted flat side is use to push cuticles so you can apply your nail polishes nicely. And sharp side is normally used to pick up decodens to stick on the nails.
ToothPick --- Can replace expensive dotting tools (will talk about this later! :) )
3)Buffer/Polish -- one side buffer , and another side to polish your nails .

1) Tweezer --- pick up decodens
2) Nail clipper -- CUT YOUR NAILS .
3) Cuticle oil --- apply to nourish your nails + helps to soften cuticles so its easier to push.

French press on guides i got for free from a nail polish collection !
DECODENS!!! :)
-Fimo canes / pearls / blings / deco wheel with star shaped blings / glitters / beads

AWESOMEST nail polish cleanser from etude house
And
Quick dry spray from Daiso (not very good)
And what else is in the box ?!
NAIL POLISHES !!

Of course! :)
There's different brands that i use so i seperated them to show you what brands i have.
All cheap one. But AWESOME :)

THE FACE SHOP
*need apply arnd 2-3 coats , colour very sheer , like O.P.I *
I use base coats + top coats from them too !

Also THE FACE SHOP
*need apply just a coat , colour very opaque*

BEAUTY CREDIT
*colour very sheer , something like the face shop*

NATURE REPUBLIC
*The two at the sides are very opaque , centre is shimmer , like the face shop but cheaper*

DAISO
ANDDDDD!!

*giam siap*
O.P.I AND SALLY HANSEN .
I don't really like the sally hansen 'cause brush too small -.-" hard to apply!!! T _ T
Okay , that's probably all i have in my box.
I'm not a nail guru or something .
I like to play arnd with nail polishes, so i only get the colours i like :)
ohoh , if i end this way , it's gonna be weird isn't it ?!
So!!! I shall sub in a TUTORIAL !!
Just a simple nail art tutorial , teaching you the basics !
Can do this with just the things you have at home! :)
As i said , I'm not a super nails guru , just that i feel like sharing what i know with you people :)
Hope you enjoy though ! ^_^"
okay.
Gonna use pastel colours..

I didn't use yellow in the end. but anyways!
Start off with CLEAN nail !

Apply BASE COAT !

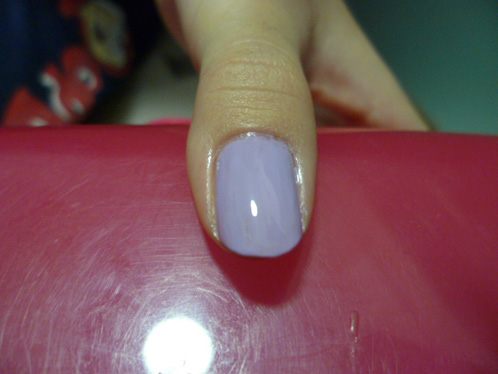
Apply any colour as base! I'm using Lavender purple ! (:
*apply two coats*

Now! You'll need a dotting tool to dot polka dots on your nails :D
Dotting tools may be EXPENSIVE so , DIY !
You can use bobby pins , bend it and use the tip.
Or use toothpick!
You may find the sharp tip too hard to work with , since you want a big polka dot!
so..

Take your toothpick and scissors.
And cut it !

You'll want the toothpick flat like this!

Okay back to the tutorial...
Take a piece of paper , put a little blue nail polish on it , and use your toothpick to pick up the polish and dot it on your nails!

.. LIKE THIS !

And , clean the toothpick , put green nail polishes , and dot smaller dots! *exert LESSER force*

:)
And you're done ...... somehow!
You can stop here 'cause its cute like this already!
But i'm continuing 'cause i'll be teaching you how to get the ribbon shape! :)
Take your toothpick , turn it another side!
And push the sharp side against a hard surface and make it slightly flat !

Then , put pink or any colour nail polish , draw out the shape by dotting motion , and keep retaking the nail polish again and again so it wouldn't go tacky!
After it dries , put top coat ..
AND ALL DONE!
*actually i think it looks nicer with the bow*

Alright!!
^_^
Hope you like this post !!
NIGHTS~~~~~ !! ♥
No comments:
Post a Comment